It's very difficult to see the dust particles with your naked eye, but it's trivial to find 'em by taking a picture of either the sky or a white LCD screen at a very small F-Stop. Then open up the file at 100% and look for the dust motes, smears, or other crud on your sensor. Optionally, you can use Photoshop to auto-level or shadow/highlight the image which makes 'em very easy to see. However, this exaggerates how bad the dust problem is, so be sure to check the original image to see what it actually looks like.
OK - so you have some dust on your sensor. There are a bazillion ways to clean it - I ordered several items from CopperHill Images. First, a large Giotto Rocket Blower was used to try to blow the dust off - works marginal at best for caked-on stuff, but still handy tool to have. I then used some Sensor Swabs by Photographic Solutions which is a "wet" solution using their Eclipse 2 solution. I had to do this twice as the first time maybe I didn't press hard enough as it wasn't a complete job, plus a lot of gunk was pushed around. CopperHill included some long cue-tip-like swabs that they said were OK to use (with E2) on the dust sensor for touchups, but these didn't seem to work too well. The SensorView device (basically a 3X magnifying glass with LCD) was actually pretty handy as I could see much better with it ... but taking images is the real test. And they even tossed in a slinky that my kids enjoy - thanks CopperHill!
I took a bunch of pictures (48 ... and x4 views plus enhanced!) so you can see how well it worked. All shot with a Canon 55-250 lens at full telephoto with aperture priority at ISO 100. Click on the Image you'd like to see, what View, what F-Stop, and at what stage in the cleaning process you want to see. Javascript is used to "flip" to the selected image. Give it a second the first time as the browser caches the image - after that, you can go back-n-forth to quickly see the dust change with F-Stop, cleaning, etc. Conclusions below.
Choose Image:
LCD
as shot -
enhanced ... or ...
Sky
as shot -
enhanced
Choose View:
original 25% resized ... or actual pixels cropped from
center -
bottom left -
top right
(all 972x648):
Choose F-Stop:
5.6 -
8.0 -
10 -
16 -
22 -
32
Choose Cleaning:
Before -
After Blower -
After First Cleaning -
After Second Cleaning

Conclusion: Dust on the camera sensor looks
scary, especially in the enhanced images. While it's mostly noticeable
at small apertures, it is annoying, but fortunately it's fairly cheap/simple
to address.
While my first cleaning pass with the sensor swab didn't do to well,
I'm happy after the second pass - be sure to look at the non-enhanced
images and even at F/32 and 100% pixels, it is difficult to see the dust
on the sensor.
A third pass would probably make the sensor close to spotless, but the
swabs aren't super cheap and should only be used once.
So if I see spots, I'll just use Photoshop to clone 'em out ... but it
sure is nice to have the dust problem massively reduced.
Canon suggests you send your camera to them for cleaning, but this was a lot simpler and cheaper. Nicholas from CopperHill was very helpful and responsive to an alteration of my order - great customer service. Everything in the picture below cost ~$50 ... and I've already used the SensorView for some other close-in work.
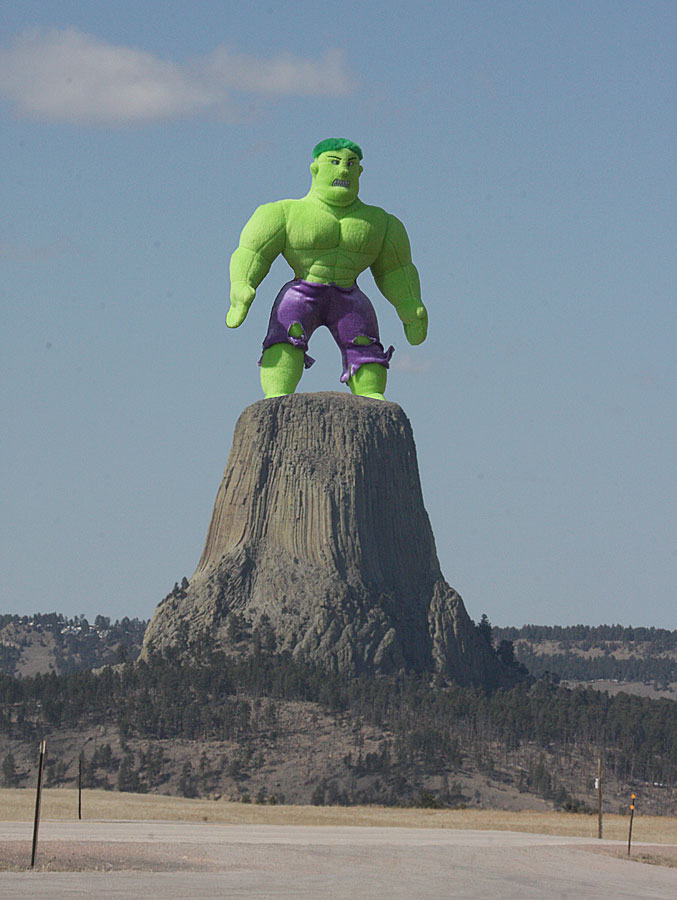
Note that the Hulkin' Devil's Tower picture was taken over six months after I had gotten the camera, so thousands of pictures had been taken and many, many lens changes ... plus this was a break-in period for the camera. So based on this review and experience, I'll probably only do sensor dust cleaning once/twice a year ... but nice to know it is easy to do and works well.
BTW, one thing that is quite noticeable is how much vigenetting
the 55-250 lens has, even at F/8.0 and especially wide-open at F/5.6.
This is a very light/small $300 lens, so you get what you pay for,
and while it's a great bargain, keep this in mind when shooting with it.
SensorView, Rocket Blower, Digital Survival Kit, and Slinky! ;-)

Hulk'in picture of Devil's Tower - note sensor dust at middle left

Back to more camera stuff.